
-150x150.jpg)


-150x150w.jpg)


How to Set Up Audio for Live Streaming: A Comprehensive Guide
As live streaming continues to grow in popularity for DJs, musicians, and creators, having a professional audio setup is key to ensuring your audience experiences top-notch sound quality. Whether you're broadcasting a DJ set, hosting a podcast, or performing live, getting your audio setup right is crucial.
In this guide, we’ll break down the essentials for setting up the audio portion of your live stream and help you avoid common pitfalls.
1. Understand Your Live Streaming Platform Requirements
Before you dive into the setup, ensure your audio equipment aligns with your streaming platform’s capabilities. Platforms like Twitch, YouTube, and Instagram may have different requirements for audio bitrate and compression.
Recommended Audio Bitrate: 128–320 kbps for clear sound.
Supported Formats: Most platforms support AAC, MP3, or WAV formats for audio input.
2. Essential Audio Equipment
Here’s what you’ll need to build a solid audio foundation:
Audio Interface
An audio interface converts analog audio signals to digital, allowing you to connect microphones or other audio equipment to your computer. We recommend:
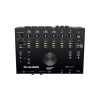
M-Audio M-Game SOLO: A user-friendly, budget-friendly interface perfect for solo streamers and gamers. It includes customizable audio effects and intuitive controls that make setup quick and easy.
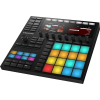
Tascam Mixcast 4: An all-in-one solution designed for podcasters and live performers. With its multitrack recording capabilities and touchscreen interface, it allows seamless mixing and broadcasting of professional-grade audio.
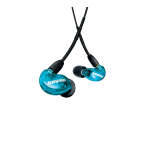
Microphones
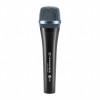
Shure MV7: A hybrid USB/XLR microphone, perfect for podcasting, streaming, and live performances. It features built-in voice isolation technology to minimize background noise and provide studio-quality sound.
Audio-Technica AT2020: A versatile condenser microphone known for its precise and natural sound capture, making it ideal for vocal-focused live streams or studio recordings.
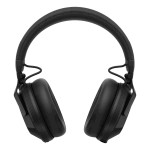
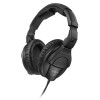
Headphones
Audio-Technica ATH-M50X: Delivers exceptional sound clarity and deep bass response. These industry-standard headphones are perfect for monitoring your audio during live streams or mixing tracks.
Sennheiser HD280 Pro: Offers outstanding noise isolation and a flat frequency response, ensuring accurate audio monitoring even in noisy environments.
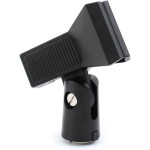
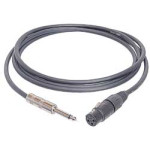
Cables
Ensure you have high-quality XLR, RCA, or TRS cables, depending on your setup. Reliable cables are essential for maintaining clean, interference-free audio signals.
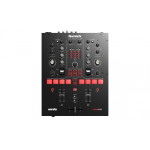
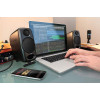
3. Connect Your Gear
Follow these steps to set up your audio gear for streaming:
Audio Interface Setup:
Connect your audio interface to your computer via USB.
Install any necessary drivers or software.
Microphone Connection:
Plug your microphone into the audio interface.
Adjust gain levels to avoid clipping.
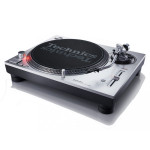
DJ Controller or Mixer:
Route your DJ controller or mixer’s master output into your audio interface.
Use balanced connections (XLR or TRS) for the best sound quality.
Monitor Your Audio:
Use headphones or studio monitors to check your levels before going live.
4. Fine-Tune Your Audio Settings
Once your equipment is connected, adjust your settings to optimize audio quality:
Set Levels: Ensure your input levels are strong but not peaking (stay below 0 dB).
Apply EQ and Compression: Use software or hardware to adjust EQ and add light compression to even out your sound.
Eliminate Noise: Use a noise gate or filters to remove background noise.
5. Streaming Software Audio Settings
Configure your streaming software (e.g., OBS Studio, Streamlabs) to work seamlessly with your audio setup:
Audio Input Source: Select your audio interface as the input device.
Sample Rate: Set to 44.1 kHz or 48 kHz for high-quality audio.
Bitrate: Aim for at least 128 kbps for music and 320 kbps for optimal clarity.
6. Test Your Setup Before Going Live
Always test your audio setup before starting your live stream:
Record a Test Run: Use your streaming software to record a sample stream and review the audio quality.
Check for Latency: Ensure there’s no noticeable delay between your video and audio.
7. Tips for Enhancing Your Audio Stream
Add Audio Effects: Enhance your live stream with effects like reverb or delay for vocals or instruments.
Monitor Viewer Feedback: Engage with your audience and adjust your audio based on their feedback.
Backup Plan: Have spare cables, adapters, or even a secondary microphone ready in case of technical issues.
Setting up audio for live streaming doesn’t have to be intimidating. With the right equipment, careful preparation, and attention to detail, you can deliver crystal-clear sound that captivates your audience. Remember, great audio can set your stream apart and keep your listeners coming back for more.
???? Need professional audio gear for your live streams? Check out our selection of top-notch audio equipment here.
Leave a Comment